
Create button

AI Tools
Good to know
A Yoti QR code is valid for 3 minutes until the user is asked to refresh.

Yoti provides a button generator for you to include in your HTML file. In the example below, the button generator script has been added to the head of the HTML document.

To generate the Yoti button please take a look at our range of Yoti buttons and pick a configuration.

This JavaScript library currently needs to be invoked – do this by calling Yoti.Share.init() in the body of your HTML document. For the config, you will need to specify a ‘domId’ so we know where we need to add the Yoti button on your page and the ‘scenarioId’ that is being provided by Yoti Hub after creating an application.

The Yoti button requires the hosting page to be accessed via HTTPS, so please make sure that your web application has HTTPS enabled.

Name

Purpose

Required

domID

Specifies the ID of the DOM node where Yoti webshare wants to be rendered.

clientSdkId

Identifies your Yoti Hub application. This value can be found in the Hub, within your application section, in the keys tab.

scenarioId

Identifies the attributes associated with your Yoti application. This value can be found on your application page in Yoti Hub (navigate to Scenarios tab)

Button

Config for the button styling.

Button - Label

Text on the button. Should be relevant for your use case.

Button - align

Alignment of the button in the parent div - "center", "left", "right"

Button - width

Width of the button - "auto" will set to fit the label. "full" - will fill the width of the parent div.

Modal - zIndex

Sets the z-index of the modal. This is defaulted to 9999.

shareComplete

Allows token handling to be performed without redirecting the webpage.

shareComplete - closeDelay

How long the modal will stay open before handling the token or redirecting. Default to 4000ms with a min of 500ms and a max of 1000ms

shareComplete - tokenHandler

Allows you to run your own function to handle the token without a redirect. Calling done() will close the modal; overwriting any closeDelay you have.

label

This is the text on the button and is customisable

title

This is the text around the QR code and is customisable

shareUrl

This is used with programmatic QR code creation. It allows you to render a Yoti QR created via the Yoti SDK. If using a shareUrl then you should not specify a scenarioId.

shareUrlProvider

shareUrlProvider is a function which resolves to a share url generated from using programmatic QR code creation. If using this method, a scenarioId should not be specified. Using this function allows us to retrieve a new programmatic QR from your server in the original QR times out.

displayLearnMoreLink

Creates a dynamic page which informs and gives context to your users of steps they need to complete to download Yoti and scan the QR code. Provided as a link below the button. This can be turned off by changing to false.

Finally, the domain port pair where the button is deployed (i.e. https://localhost:8000) must match the one that you have configured in Yoti Hub. This prevents other web sites from embedding your Yoti button.

HintYoti highly recommends you enable the learn more page. It's a free feature and will provide a users with full context on the share process.


Supported Translations (Locale)

Yoti offers the ability to force a language locale for the front end client - see list here:

Language

Parameter

English

en-GB (default)

French (Français)

fr

Spanish (Español)

es

German (Deutsch)

de

Czech (čeština)

cz

Polish (polski)

pl


The modal QR code option has a button which when clicked opens a modal pop out window with the QR code present. There are three tabs, describing how to scan the QR code, The QR code and attributes to be shared and about Yoti - Please give it a click to see it working:

<!-- Simple Button Generation --> <head> <script src="https://www.yoti.com/share/client/"></script> </head> <body> <!-- Yoti element will be rendered inside this DOM node --> <div id="xxx"></div> <!-- This script snippet will also be required in your HTML body --> <script> window.Yoti.Share.init({ elements: [ { domId: "xxx", scenarioId: "xxxxxx-xxxx-xxxx-xxxx-xxxxxxxxxxxx", clientSdkId: "xxxxxx-xxxx-xxxx-xxxx-xxxxxxxxxxxx", displayLearnMoreLink: true, } ] }); </script> </body>
<!-- Advanced Button Generation --> <head> <script src="https://www.yoti.com/share/client/"></script> </head> <body> <!-- Yoti element will be rendered inside this DOM node --> <div id="xxx"></div> <!-- This script snippet will also be required in your HTML body --> <script> window.Yoti.Share.init({ // optional localisation, default english locale: "fr", elements: [ { domId: "xxx", scenarioId: "xxxxxx-xxxx-xxxx-xxxx-xxxxxxxxxxxx", clientSdkId: "xxxxxx-xxxx-xxxx-xxxx-xxxxxxxxxxxx", displayLearnMoreLink: true, button: { label: "Use Yoti", align: "center", // "left" | "right" width: "full" // "auto" }, modal: { zIndex: 9999 // default to 9999, min of 0 - max of 2147483647 }, shareComplete: { closeDelay: 4000, // default to 4000, min of 500 - max of 10000 mobileFlow: "internal", // required for mobile web support when using shareComplete tokenHandler: (token, done) => { console.log(`Received the token: ${token}`); done(); //done() will overwrite the closeDelay } } } ] }); </script> </body>
// Example React Component const YotiButton = props => { const buttonRef=useRef(null) useEffect(() =>{ const yoti=window.Yoti.Share.init({ 'elements': [{ 'clientSdkId': props.clientSdkId, 'scenarioId': props.scenarioId, 'domId': buttonRef.current.id, 'button': { 'label': props.text } }] }) return yoti.destroy }, [props.clientSdkId]) return( <div style={{ height: props.height, width: props.width}} ref={buttonRef} id="button-ref" /> ) }
// Example Angular Component // Include the yoti client script in the head of your index.html file // <script src="https://www.yoti.com/share/client/"></script> // You can directly refer to the window object, but it is a good practice to create wrapper service that gets the native window object. // Create target <div> with an id, in you template and initialize the Yoti Init() method within your Angular component in the below format import { Component, OnInit, OnDestroy} from '@angular/core'; import { WindowRefService } from '../window-ref.service'; @Component({ selector: 'app-yoti-button', templateUrl: './yoti-button.component.html', }) export class YotiButtonComponent implements OnInit, OnDestroy { private WinObj : any; private YotiButton : any; constructor(private winRef:WindowRefService) { this.WinObj = winRef.nativeWindow; } ngOnInit(): void { this.YotiButton = this.WinObj.Yoti.Share.init({ elements: [ { domId: "yotibutton", scenarioId: "xxxxxxxx-xxxx-xxxx-xxxx-xxxxxxxxxxxx", clientSdkId: "xxxxxxxx-xxxx-xxxx-xxxx-xxxxxxxxxxxx", button: { label: "Use Yoti", align: "center", // "left" | "right" width: "auto" // "full" }, modal: { zIndex: 9999 // default to 9999, min of 0 - max of 2147483647 }, } ] }); } } // To destroy the Yoti-Button object, before re-initializing it, eg: on Router Path Changes. ngOnDestroy(): void { this.YotiButton.destroy(); }
<!-- Advanced Button Generation --> <head> <script src="https://www.yoti.com/share/client/"></script> </head> <body> <!-- Yoti element will be rendered inside this DOM node --> <div id="xxx"></div> <!-- This script snippet will also be required in your HTML body --> <script> window.Yoti.Share.init({ elements: [ { domId: "xxx", // For use with programmatic qr codes ONLY shareUrlProvider() { return fetch(('/location of QR code')) .then(response => response.json()) .then(data => data.qr); // where 'qr' is your dynamic qr url); }, // For use with programmatic qr codes ONLY shareUrl: "your programmatic qr url", // Do not use scenarioId with shareUrl or shareUrlProvider clientSdkId: "xxxxxx-xxxx-xxxx-xxxx-xxxxxxxxxxxx", button: { label: "Use Yoti", align: "center", // "left" | "right" width: "full" // "auto" }, modal: { zIndex: 9999 // default to 9999, min of 0 - max of 2147483647 }, shareComplete: { closeDelay: 4000, // default to 4000, min of 500 - max of 10000 mobileFlow: "internal", // required for mobile web support when using shareComplete tokenHandler: (token, done) => { console.log(`Received the token: ${token}`); done(); //done() will overwrite the closeDelay } } } ] }); </script> </body>

Inline QR

The inline QR code option has a button which when clicked opens just the QR code. You will need to provide more context as to what Yoti is for this. See Scenario examples for more detail.
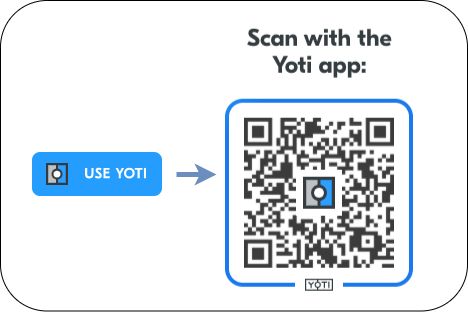
Inline qr code
<!-- Simple Button Generation --> <head> <script src="https://www.yoti.com/share/client/"></script> </head> <body> <!-- Yoti element will be rendered inside this DOM node --> <div id="xxx"></div> <!-- This script snippet will also be required in your HTML body --> <script> window.Yoti.Share.init({ elements: [ { domId: "xxx", scenarioId: "xxxxxx-xxxx-xxxx-xxxx-xxxxxxxxxxxx", clientSdkId: "xxxxxx-xxxx-xxxx-xxxx-xxxxxxxxxxxx", type: "inline", displayLearnMoreLink: true, button: { label: " Use Yoti", title: " Scan with the Yoti app" } } ] }); </script> </body>

Instant QR

The instant QR code option is just the QR code with no button. You will need to provide more context as to what Yoti is for this. Example below:
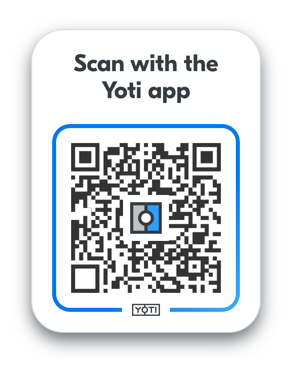
Instant QR code
<!-- Simple Button Generation --> <head> <script src="https://www.yoti.com/share/client/"></script> </head> <body> <!-- Yoti element will be rendered inside this DOM node --> <div id="xxx"></div> <!-- This script snippet will also be required in your HTML body --> <script> window.Yoti.Share.init({ elements: [ { domId: "xxx", scenarioId: "xxxxxx-xxxx-xxxx-xxxx-xxxxxxxxxxxx", clientSdkId: "xxxxxx-xxxx-xxxx-xxxx-xxxxxxxxxxxx", type: "inline", displayLearnMoreLink: true, qr: { title: " Scan with the Yoti app" } } ] }); </script> </body>
Before you continue
Please have a look at our best practices. We recommend taking them into account for a better performance of the SDK.

Yoti QR code page

This is automatically generated when you create an application in the hub. You will define the following inside the hub.

  • Attributes

  • Call back URL

  • Customisation (logo and background)

This service is a no code integration see Set up for more information, you can be live in a matter of minutes.

Please see this page as an example.


Static QR

A static QR code has no expiry to reload the QR code. Dynamic QR codes have an expiry of 3 minutes until a reload is required. This provides a low cost/offline verification that users can print out and use as many times as needed. Data sent via a static QR code can be viewed in the hub as a receipt.

The process is:

  1. Create an organisation on the hub.

  2. Create an application on the hub and add your scenario.

  3. Send your SDK ID our support form

We aim to get your QR code to you in 3-4 working days.


Non Browser QR

If you're looking at integrating Yoti with a 'Non-browser' client, one of the tasks you will need to do is request a Yoti QR code from Yoti's servers. This URL must be transformed into a QR code before it can be scanned with the Yoti app. Yoti provides a simple API to transform this URL into an official Yoti QR.

This section below describes the process of creating a personalised client which triggers the Yoti QR flow.

It is possible to manually construct this QR code as this can be necessary in cases where you do not have access to a Web server on your front end, for example using a kiosk of GUI.

Requesting a QR code is broken down into the following steps:

  1. Requesting a QR code from Yoti Servers

  2. Rending the QR code

  3. Decoding and resolving the QR code metadata

  4. Opening a web socket channel to Yoti using the resolved metadata

  5. Receiving a Yoti token over the web socket channel or handling a session error

  6. Passing the received token to the callback url that has been specified in Yoti Hub

Request a QR code

In order to request a QR code from Yoti Servers the client must create a GET HTTPS request to the following Retrieve a QR Codeendpoint:

Retrieve a QR code endpoint

GET https://api.yoti.com/api/v1.1/sessions/apps/<sdkId>/scenarios/<scenarioId>

Parameter

Description

sdkId

sdkId is the SDK_ID found with your Yoti Hub Application

scenarioId

scenarioId is the Scenario ID found within your Yoti Hub Application that relates to a specific scenario

A Yoti QR code contains a URL and is returned in full from the Retrieve a QR code endpoint.

An example of how a URL in a QR code should look is as follows:

https://code.yoti.com/CAEaJDlhMzg5MTRiLTg0ZDAtNGI3Zi05NDNiLWQzNzBmNmM3YTVlYzAA
Good to know...
The important section of the URL is the string that follows https://code.yoti.com/. This is a base 64 url encoded Protocol Buffer.

Rendering a Yoti QR Code

This URL must be transformed into a QR code before it can be scanned with the Yoti app. Yoti provides a simple API to transform this URL into an official Yoti QR - This is important to establish trust between your user base and Yoti.
Static QR code example
POST https://api.yoti.com/api/v1/qrcodes/image

The following headers are required to use the image service:

Header

Value

Description

Accept

The follow Accept values can be provided in the header

  • image/svg+xml

  • image/png

Returns a formatted QR code as an svg or png

Content-Type

application/json

Sets the correct content type

The request body should be formed as JSON, specifying a URL (mandatory) and an image size (option).

{ "url": "https://code.yoti.com/<YotiCode>" }

Field

Value

url

This is the URL returned from requesting a Yoti QR

Error codes

Code

Description

Resolution

400

Missing url field in the request body

Ensure to POST a JSON body containing a url

406

Empty Accept header

Send a request Accept header with the required image return type

406

An Accept header was sent with an invalid return type

Ensure the Accept header is one of

  • image/svg+xml

  • image/png

Decoding and resolving the QR code metadata

In order to decode and resolve the URL returned by the requesting a QR codeendpoint and retrieve the QR code metadata, it is necessary to:

  1. Split the URL by https://code.yoti.com/ keeping the QR code data, i.e. CAEaJDlhMzg5MTRiLTg0ZDAtNGI3Zi05NDNiLWQzNzBmNmM3YTVlYzAA

  2. Base 64 url decode the obtained string.

byte[] bytes = Base64.getUrlDecoder().decode(str);

Unmarshal the protocol buffer data structure using the following proto definition:

syntax = "proto2"; package qrpubapi_v1; option java_package = "com.yoti.qrpubapi_v1"; option java_outer_classname = "QrCodeMsgProto"; enum Issuer { CONNECT = 1; } enum Transport { UNDEFINED = 0; URI = 1; QR_CODE = 2; } message QrCodeMsg{ optional Issuer issuer = 1; optional bytes sharing_token = 2; optional bytes ref_id = 3; optional bytes policy = 4; optional Transport transport = 6; }
Good to know
Major languages provide protobuf compilers to generate code that automatically handles protocol buffers marshalling/unmarshalling. If you are using the java protobuf compiler and you have generated your proto stubs, un marshalling the described protocol buffer is very simple.
QrCodeMsg qrCodeMsg = QrCodeMsg.parseFrom(bytes);

Although there are few fields in the described data structure, we are only interested in the field named "ref_id", since the others are used by the Yoti app, in order to properly handle the scanned code.

The ref_id field must be interpreted as a UTF-8 string (default encoding for the Java language when creating a String object) and used to retrieve the QR code meta data. This can be achieved by invoking the retrieve QR code metadata endpoint:

https://api.yoti.com/api/v1.1/qrcodes/refs/<ref_id>

Parameter

Description

ref_id

This is the UTF-8 string representation of the ref_id field obtained from the proto buffer data structure.

The result of this invocation is a JSON payload that looks like the following:

{ "name": "App name", "policy": "CggKBnNlbGZpZQoOCgxwaG9uZV9udW1iZXISEgoQYXBwbGljYXRpb25fbG9nbxIRCg9hcHBsaWNhdGlvbl91cmwSEgoQYXBwbGljYXRpb25fbmFtZRIdChthcHBsaWNhdGlvbl9yZWNlaXB0X2JnY29sb3IYASAA", "application_id": "a9c4a5ad-d9e5-4fc8-a561-6eedbc882691", "application_name": "Yoti App", "receipt_bg_color": "#2D9FFF", "callback_endpoint": "https://yoti.com/app", "sharing_token": "2z94Ix7B7t6B+C3aUSy/6bBuMzQJYZqEBbQa9fp3O6r0bqRgpp0VveojLu8FxdLT", "session_data": "0LBGRyLy-422ef9b5-871f-4fba-8bed-e70bc4a1e650" }

The field we are interested in is the one named "session_data" and it will be used to establish a web socket channel through which our client will get notified about a successful/failed interaction.

Attribute "callback_endpoint" will be used in the last step of this guide.

Opening a web socket channel

Opening a web socket channel to Yoti using the resolved metadata

To create a web socket channel to Yoti servers, it is necessary to hit the following web socket channelendpoint using a web socket client:

wss://api.yoti.com/api/v1.1/connect-sessions/<session_data>

Parameter

Description

session_data

The session_data obtained from the call to retrieve QR code endpoint

Good to know
It is important to know that different clients connect using different schemes: some use the WSS protocol, while others make an https request and expect the server to do the upgrade to WSS (this is the standard approach).

Once the connection is established, you will need to send an initial subscription message, the value of this is the session_data used to create the channel. An example of this is shown below.

{ "subscription": <session_data> }
var socket = new WebSocket(socketAddress + '/connect-sessions/' + session_data) socket.onopen = function() { socket.send(JSON.stringify({subscription: session_data})) }

The server will send the following message back over the channel:

//successful message { "status" : "ACCEPTED", "subscription" : "0LBGRyLy-422ef9b5-871f-4fba-8bed-e70bc4a1e650" } // invalid session_data value has been provided, { "status" : "REJECTED", "subscription" : "0LBGRyLy-422ef9b5-871f-4fba-8bed-e70bc4a1e650" }

Receiving a token

Receiving a Yoti token over the web socket channel or handling a session error. Assuming the connection was successfully established, a further message will be prompted that signals the completion of the transaction.

If the transaction fails, the server will send the following message:

{ "status" : "FAILED", "subscription" : "0LBGRyLy-422ef9b5-871f-4fba-8bed-e70bc4a1e650" }

If the transaction times out, the server will send the following message:

{ "status" : "TIMED_OUT", "subscription" : "0LBGRyLy-422ef9b5-871f-4fba-8bed-e70bc4a1e650" }

If any of the last two messages occur, you should restart the process by requesting a new QR code.

Let's finally see what happens when a transaction is successfully completed. In this case the server will send the following message:

{ "status" : "COMPLETED", "subscription" : "0LBGRyLy-422ef9b5-871f-4fba-8bed-e70bc4a1e650", "token" : "egouerghwl4itjxpri4oty5ihfli4yg7tgbnkrliu" }

The token here is the Yoti token that must be passed to your application back-end, in order to retrieve the user shared profile using the Yoti SDKs.

Below is a javascript example that shows how to implement the logic that is necessary to correctly handle the channel communication.

var socket = new WebSocket(socketAddress + '/connect-sessions/' + connection) socket.onopen = function() { socket.send(JSON.stringify({subscription: connection})) } socket.onmessage = function(e) { var message = JSON.parse(e.data) switch(message.status) { case 'COMPLETED': var token = message.token // send token to backend here break; case 'ACCEPTED': break; case 'TIMED_OUT': // restart process break; case 'REJECTED': // restart process break; } }

Passing the token to the callback URL

Passing the received token to the callback url that has been specified in Yoti Hub.

Finally, the received token must be forwarded to your back-end, which should be listening for GET requests at the address specified by the attribute named "callback_endpoint" that has been returned as a response to the request to requesting a QR codeendpoint.

The token should be provided as a query string parameter, so, in this example, the client should send a GET request to the follow URL:

https://yoti.com/app?token=egouerghwl4itjxpri4oty5ihfli4yg7tgbnkrliu

It is worth noticing that, in case you are deploying your client in different physical locations, this would be the best point to provide some metadata by personalising your request to your own back-end.

The example above could be extended by providing more parameters:

https://yoti.com/app?token=egouerghwl4itjxpri4oty5ihfli4yg7tgbnkrliu&lane=2&location=WC2N4JH

Your endpoint can return any value in any format, since your client will handle it. Our suggestion is at least to capture the result of the interaction with the Yoti SDK and tell the client whether the interaction succeeded or not.


Dynamic QR

This QR code is generated differently. By "dynamic" we mean that the attributes must be provided as part of the QR code request as opposed to where the attributes is defined upfront in hub. This allows for higher flexibility, for example as part of your integration you can create a set of fields that must be filled in by the user, the set of required attributes is intrinsically dynamic from Yoti as it depends on the type of information received manually.

Please launch this demo to view how this works: https://yoti.world/dynamicqr/.

This section below describes the process of creating a dynamic QR code broken down into the following steps:

  1. Creating the policy

  2. Creating the scenario

  3. Creating a share URL

Creating the policy

A policy is used to define what attributes are requested from the user. You can use the builder to define what attributes are needed. There are multiple different ways to add an attribute to a policy:

  1. Using our self built method allowing you to customise the attribute with source constraints.

  2. Using our out of the box attribute with default settings, which is no constraints.

  3. Easier readable methods with default settings, which is no constraints.

const selfBuiltAttribute = new Yoti.WantedAttributeBuilder() .withName("full_name") .withConstraints(constraints) .withAcceptSelfAsserted() .build(); const dynamicPolicy = new Yoti.DynamicPolicyBuilder() // using an attribute you build .withWantedAttribute(selfBuiltAttribute) // using an attribute by name .withWantedAttributeByName("full_name") // using a predefined method to add an attribute .withFullName() // if you wish the user to prove it's them by taking a selfie on share .withSelfieAuthentication() .build();
WantedAttribute selfBuiltAttribute = new SimpleWantedAttributeBuilder() .withName("full_name") .withAcceptSelfAsserted() .build(); DynamicPolicy dynamicPolicy = new SimpleDynamicPolicyBuilder() //using an attribute you build .withWantedAttribute(givenNamesWantedAttribute) //using an attribute by name .withWantedAttribute(true,"full_name") //using a predefined method to add an attribute .withFullName() //if you wish the user to prove it's them by taking a selfie on share .withSelfieAuthorisation(true) .build();
<?php use Yoti\ShareUrl\Policy\WantedAttributeBuilder; use Yoti\ShareUrl\Policy\DynamicPolicyBuilder; $selfBuiltAttribute = (new WantedAttributeBuilder()) ->withName("full_name") ->withConstraints(constraints) ->withAcceptSelfAsserted() ->build(); $dynamicPolicy = (new DynamicPolicyBuilder()) //using an attribute you build ->withWantedAttribute(selfBuiltAttribute) //using an attribute by name ->withWantedAttributeByName("full_name") //using a predefined method to add an attribute ->withFullName() //if you wish the user to prove it's them by taking a selfie on share ->withSelfieAuthentication() ->build();
from yoti_python_sdk.dynamic_sharing_service.policy import ( DynamicPolicyBuilder, WantedAttributeBuilder, ) selfBuiltAttribute = (WantedAttributeBuilder() .with_name("full_name") .with_constraint(constraints) .with_accept_self_asserted() .build() ) dynamicPolicy = (DynamicPolicyBuilder() # using an attribute you build .with_wanted_attribute(selfBuiltAttribute) # using an attribute by name .with_wanted_attribute("full_name") # using a predefined method to add an attribute .with_full_name() # if you wish the user to prove it's them by taking a selfie on share .with_selfie_auth() .build() )
var wantedAttribute = new WantedAttributeBuilder() .WithName("full_name") .WithConstraints(constraints) .WithAcceptSelfAsserted() .Build(); var dynamicPolicy = new DynamicPolicyBuilder() //using an attribute you build .WithWantedAttribute(wantedAttribute) //using an attribute by name .WithWantedAttributeByName("full_name") //using a predefined method to add an attribute .WithFullName() //if you wish the user to prove it's them by taking a selfie on share .WithSelfieAuthentication() .Build();
package main import ( "github.com/getyoti/yoti-go-sdk/v3" "github.com/getyoti/yoti-go-sdk/v3/dynamic" ) selfBuiltAttribute := ( &dynamic.PolicyBuilder{}) .WithName("full_name") .WithConstraints(constraints) .WithAcceptSelfAsserted() .Build(); ) dynamicPolicy := ( &dynamic.WantedAttributeBuilder{}) //using an attribute you build .WithWantedAttribute(selfBuiltAttribute) //using an attribute by name .withWantedAttributeByName("full_name") //using a predefined method to add an attribute .WithFullName() //if you wish the user to prove it's them by taking a selfie on share .WithSelfieAuth() .Build() )

You can apply constraints to an attribute. The only available constraint is to limit the source of the attribute, eg. to limit full_name to only come from a passport.

If a constraint has "soft preference" set to 'true' then the attribute will still be shared from another source if it the specified source is not present.

See Attributes explained section for more details.

const sourceConstraint = new Yoti.SourceConstraintBuilder() // Passport .withPassport() // Driving Licence .withDrivingLicence() // National ID .withNationalId() // Passcard .withPasscard() .withSoftPreference(false) .build(); const constraints = new Yoti.ConstraintsBuilder() .withSourceConstraint(sourceConstraint) .build(); const selfBuiltAttribute = new Yoti.WantedAttributeBuilder() .withName("full_name") .withConstraints(constraints) .withAcceptSelfAsserted() .build();
WantedAnchor passportAnchor = new SimpleWantedAnchorBuilder() .withValue("PASSPORT") .build(); WantedAnchor drivingLicenceAnchor = new SimpleWantedAnchorBuilder() .withValue("DRIVING_LICENCE") .build(); WantedAnchor nationalIdAnchor = new SimpleWantedAnchorBuilder() .withValue("NATIONAL_ID") .build(); WantedAnchor passcardAnchor = new SimpleWantedAnchorBuilder() .withValue("PASSCARD") .build(); SourceConstraint sourceConstraint = new SimpleSourceConstraintBuilder() //Passport .withWantedAnchor(passportAnchor) //Driving Licence .withWantedAnchor(drivingLicenceAnchor) //National ID .withWantedAnchor(nationalIdAnchor) //Passcard .withWantedAnchor(passcardAnchor) .withSoftPreference(false) .build(); WantedAttribute selfBuiltAttribute = new SimpleWantedAttributeBuilder() .withName("full_name") .withConstraint(sourceConstraint) .withAcceptSelfAsserted(true) .build();
<?php use Yoti\ShareUrl\Policy\WantedAttributeBuilder; use Yoti\ShareUrl\Policy\ConstraintsBuilder; use Yoti\ShareUrl\Policy\SourceConstraintBuilder; $sourceConstraint = (new SourceConstraintBuilder()) //passport ->withPassport() //Driving Licence ->withDrivingLicence() //National ID ->withNationalId() //Passcard ->withPasscard() ->withSoftPreference(false) ->build(); $constraints = (new ConstraintsBuilder()) ->withSourceConstraint(sourceConstraint) ->build(); $selfBuiltAttribute = (new WantedAttributeBuilder()) ->withName("full_name") ->withConstraints(constraints) ->withAcceptSelfAsserted() ->build();
from yoti_python_sdk.dynamic_sharing_service.policy import ( SourceConstraintBuilder, ConstraintsBuilder WantedAttributeBuilder, ) sourceConstraint = (SourceConstraintBuilder() #passport .with_passport() #Driving Licence .with_driving_licence() #National ID .with_national_id() #Passcard .with_passcard() .with_soft_preference(false) .build() ) constraints = (ConstraintsBuilder() .with_source_sonstraint(sourceConstraint) .build() ) selfBuiltAttribute = (WantedAttributeBuilder() .with_name("full_name") .with_constraints(constraints) .with_accept_self_asserted() .build() )
Constraint sourceConstraint = new SourceConstraintBuilder() //passport .WithPassport() //Driving Licence .WithDrivingLicence() //National ID .WithNationalId() //Passcard .WithPasscard() .WithSoftPreference(false) .Build(); WantedAttribute wantedAttribute = new WantedAttributeBuilder() .WithName("full_name") .WithConstraints(sourceConstraint) .WithAcceptSelfAsserted() .Build();
package main import ( "github.com/getyoti/yoti-go-sdk/v3" "github.com/getyoti/yoti-go-sdk/v3/dynamic" ) sourceConstraint := ( &dynamic.SourceConstraintBuilder() //passport .WithPassport() //Driving Licence .WithDrivingLicence() //National ID .WithNationalId() //Passcard .WithPasscard() .WithSoftPreference(false) .Build(); ) constraints := ( &dynamic.ConstraintsBuilder() .WithSourceConstraint(sourceConstraint) .Build(); ) selfBuiltAttribute := ( &dynamic.WantedAttributeBuilder() .WithName("full_name") .WithConstraints(constraints) .WithAcceptSelfAsserted() .Build(); )

Creating a scenario

The Dynamic Scenario is built using:

  • The policy

  • A callback URL for share completion. After the share is completed, the callback URL is where the user will be redirected to the specified page. A one time use token will be added to the URL. You can use this token to retrieve the profile of the share.

  • Any extensions e.g. Location constraint

const dynamicScenario = new Yoti.DynamicScenarioBuilder() .withCallbackEndpoint("/your-callback") .withPolicy(dynamicPolicy) //if using an extension .withExtension(extension) .build();
DynamicScenario dynamicScenario = new SimpleDynamicScenarioBuilder() .withCallbackEndpoint("/your-callback") .withPolicy(dynamicPolicy) //if using an extension .withExtension(extension) .build();
<?php use Yoti\ShareUrl\Policy\DynamicScenarioBuilder; $dynamicScenario = (new DynamicScenarioBuilder()) ->withCallbackEndpoint("/your-callback") ->withPolicy(dynamicPolicy) //if using an extension ->withExtension(extension) ->build();
from yoti_python_sdk.dynamic_sharing_service.policy import ( DynamicScenarioBuilder ) dynamicScenario = (DynamicScenarioBuilder() .with_callback_endpoint("/your-callback") .with_policy(dynamicPolicy) # if using an extension .with_extension(extension) .build() )
var dynamicScenario = new DynamicScenarioBuilder() .WithCallbackEndpoint("/your-callback") .WithPolicy(dynamicPolicy) //if using an extension .WithExtension(extension) .Build();
dynamicScenario = := ( &dynamic.DynamicScenarioBuilder() .WithCallbackEndpoint("/your-callback") .WithPolicy(dynamicPolicy) //if using an extension .WithExtension(extension) .Build(); )

Create a share URL

Using the dynamic scenario you need to get a shareURL which will be used by the Yoti scripts to generate a Yoti QR code.

yotiClient.createShareUrl(dynamicScenario) .then((shareUrlResult) => { const shareURL = shareUrlResult.getShareUrl(); }).catch((error) => { console.error(error.message); });
try { String shareUrl = client.createShareUrl(dynamicScenario).getUrl(); } catch (DynamicShareException e) { LOG.error(e.getMessage()); }

Once you have your share URL, you can send it to the frontend for it to be rendered in a Yoti QR code. You can provide the shareUrl directly, or use shareUrlProvider to fetch it dynamically from your backend. Please see the examples below using the modal QR code. You can add it to your site using either the JavaScript approach or the NPM module method.

Webshare Module

<!-- QR Generation with Share URL --> <head> <script src="https://www.yoti.com/share/client/"></script> </head> <body> <!-- Yoti element will be rendered inside this DOM node --> <div id="xxx"></div> <!-- This script snippet will also be required in your HTML body --> <script> window.Yoti.Share.init({ elements: [ { domId: "xxx", shareUrl: "shareURL", clientSdkId: "xxxxxx-xxxx-xxxx-xxxx-xxxxxxxxxxxx", displayLearnMoreLink: true, } ] }); </script> </body>
<!-- QR Generation with Share URL Provider --> <head> <script src="https://www.yoti.com/share/client/"></script> </head> <body> <!-- Yoti element will be rendered inside this DOM node --> <div id="xxx"></div> <!-- This script snippet will also be required in your HTML body --> <script> window.Yoti.Share.init({ elements: [ { domId: "xxx", shareUrlProvider: async () => { const response = await fetch('/your-backend-endpoint'); const data = await response.json(); return data.shareUrl; }, clientSdkId: "xxxxxx-xxxx-xxxx-xxxx-xxxxxxxxxxxx", displayLearnMoreLink: true, } ] }); </script> </body>
<!-- Dynamic QR Generation with NPM Module --> // Install the Yoti Share Client Core module npm install @getyoti/share-client-core // Import and use in your JavaScript/TypeScript project import { startYotiModalShare } from '@getyoti/share-client-core'; await startYotiModalShare({ clientSdkId: 'xxxxxx-xxxx-xxxx-xxxx-xxxxxxxxxxxx', domId: 'xxx', controls: { shareUrlProvider: async () => { // Fetch the dynamic share URL from your backend const response = await fetch('/your-backend-endpoint'); const data = await response.json(); return data.shareUrl; }, }, options: { skinId: 'digital-id-uk', // or other skin as needed button: { width: 'full', }, }, }); // Make sure to have a <div id="xxx"></div> in your HTML

Examples

Full examples are located here:


Query parameters

You can append query params to the landing page URL that displays the Yoti button. These will be added to the callback URL.

For example if you load the landing page containing the Yoti button as follows:

https://example.com/?iso=test&user_id=6667

The query parameters (iso=test&user_id=6667) will be returned in the callback URL.